Making a boomerang might seem complicated at first glance, but with the right instructions and materials, it's definitely doable. Of course, you can also buy a boomerang from our shop, but making one yourself is incredibly cool. For us, that first father-son boomerang-making project years ago was ultimately the brilliant first step on the path to our father-son boomerang workshop.
Here is a basic guide to help you get started:
What you need to build a boomerang
Boomerang construction plan
A good boomerang construction plan is key to success. You can find and download these plans online. If you can't find what you're looking for, check out the website of the German Boomerang Club . There you'll find a wide variety of designs, which you can then choose according to your skill level or simply based on what you like best. Also, keep in mind that there are different construction plans for left-handed and right-handed boomerangs.
Air plywood
High-quality aircraft-grade plywood is crucial for the flight characteristics of your boomerang. It should be lightweight yet robust enough to withstand the forces of the throw. In any case, make sure it has as many layers as possible. Regular plywood from a hardware store isn't particularly suitable; it's best to look on specialized model-making websites. For our boomerangs, we typically use 4mm thick aircraft-grade plywood with 7 layers. Even though this is a bit more expensive, it's worth it to ensure the boomerang doesn't break or get damaged upon landing.
Tools
You will need the following tools, which you probably already have at home or can alternatively get at any hardware store, for your boomerang.
- File: For shaping and smoothing wood.
- Sandpaper or sanding sponge: For finer work and for smoothing the surface.
- Clamp: To securely fix the wood and work precisely. Ideally, use a wooden clamp, protected with Korg to prevent damage to the surface of your boomerang.
protective coating
To protect your boomerang from the elements, it's recommended to coat it with a stain, varnish, or oil. This not only extends its lifespan but also gives the boomerang an attractive appearance. If you'd like to be kind to the environment, choose an eco-friendly stain. We use a natural oil, for example, which is excellent for giving the boomerang a beautiful color and protecting it.
Steps to the boomerang:
You will need to/can then follow these steps to finally be able to proudly hold your new boomerang in your hands. As I said, it sounds complicated at first, but you can definitely manage it.
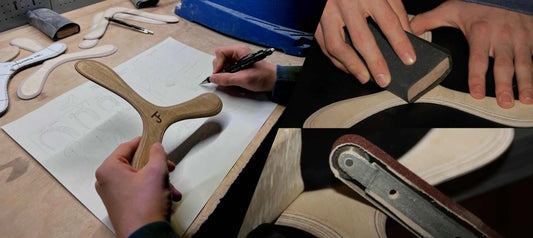
Take a close look at the boomerang construction plan
Before you begin building, it's important to carefully review the boomerang construction plan. Understand exactly where you need to sand what. Also, double-check that you've selected the correct plan, depending on whether you're right- or left-handed.
Prepare materials
Cut out the pattern pieces according to the construction plan and make sure you have everything you need ready. This includes, most importantly, the plywood, a file (if you're not working with a pre-made blank), a jigsaw or coping saw, and a clamp to secure the wood or blank to your workbench.
Production blank
Using the template, trace the exact outline of the boomerang onto the wood. Secure the wood accordingly and use a jigsaw or coping saw to cut out the blank. Ensure good ventilation or dust extraction, as a considerable amount of sawdust can be generated during the creation of the blank and in the subsequent steps.
Boomerang cut
Use a pencil to mark on the blank where exactly sanding is needed. Then, use a file and sandpaper to shape the boomerang. Keep in mind the aerodynamic principles that are important for a successful return flight. If you follow the sanding pattern precisely, nothing should go wrong. It doesn't have to be accurate to the millimeter, but try to stick to the template as closely as possible.
Final touches
Refine the surface of your boomerang with fine sandpaper or a sanding sponge to ensure a smooth and aerodynamic finish. Using extra-fine sandpaper will make the surface wonderfully soft, and the boomerang will feel almost like a smooth, comfortable object.
protective coating
Apply a varnish, lacquer, or oil to protect your boomerang from the elements and give it an attractive appearance. Then let the boomerang dry according to the instructions on the packaging.
Be proud
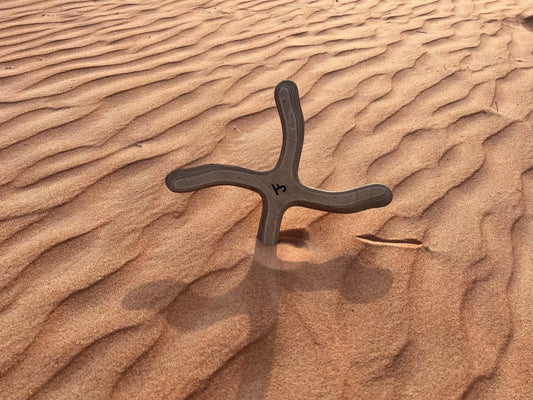
You're now holding your first homemade boomerang in your hands – you should be a little proud of that! Congratulations! You're now officially a boomerang maker!
Before the first flight:
You've built your first boomerang, it's sanded, dried, and looks great. Now it's time to throw it for the first time.
Before your first flight, please be sure to read the detailed instructions and follow all safety guidelines! This is really important to ensure you have lots of fun and don't accidentally endanger yourself or others.
If you need help with how exactly to throw a boomerang, feel free to check out our instruction page, where we describe step by step how it works and our boomerang throwing tutorial on YouTube is also linked there.
Remember, practice makes perfect. Even if it doesn't come back the first time, don't get frustrated. Maybe pay a little more attention to the wind and the launch angle, and then it might work.
We hope you have as much fun building boomerangs as we did, and we hope you found the instructions helpful. If so, please leave a comment. Of course, we'd also appreciate it if you'd like us to elaborate on anything.
Have fun building and throwing your own boomerang!
Jürgen & Felix
Had enough of reading, want to try it out yourself? Then take a look in our online shop and choose the right boomerang for you: Online Shop
Images: Self-made, ideogram, DBC


 https://www.jfbumerang.de/pages/bumerang-bauen